Issue Type Filters v.4 Doc
This is the users guide for version 4 of the plugin.
If you did not download it yet, you can do that by clicking here.
Installation
This is done through the JIRA marketplace. Or, simply download the plugin and upload it in the Addons section of JIRA.
Setup (with example)
1. Click Administration, then Issues.
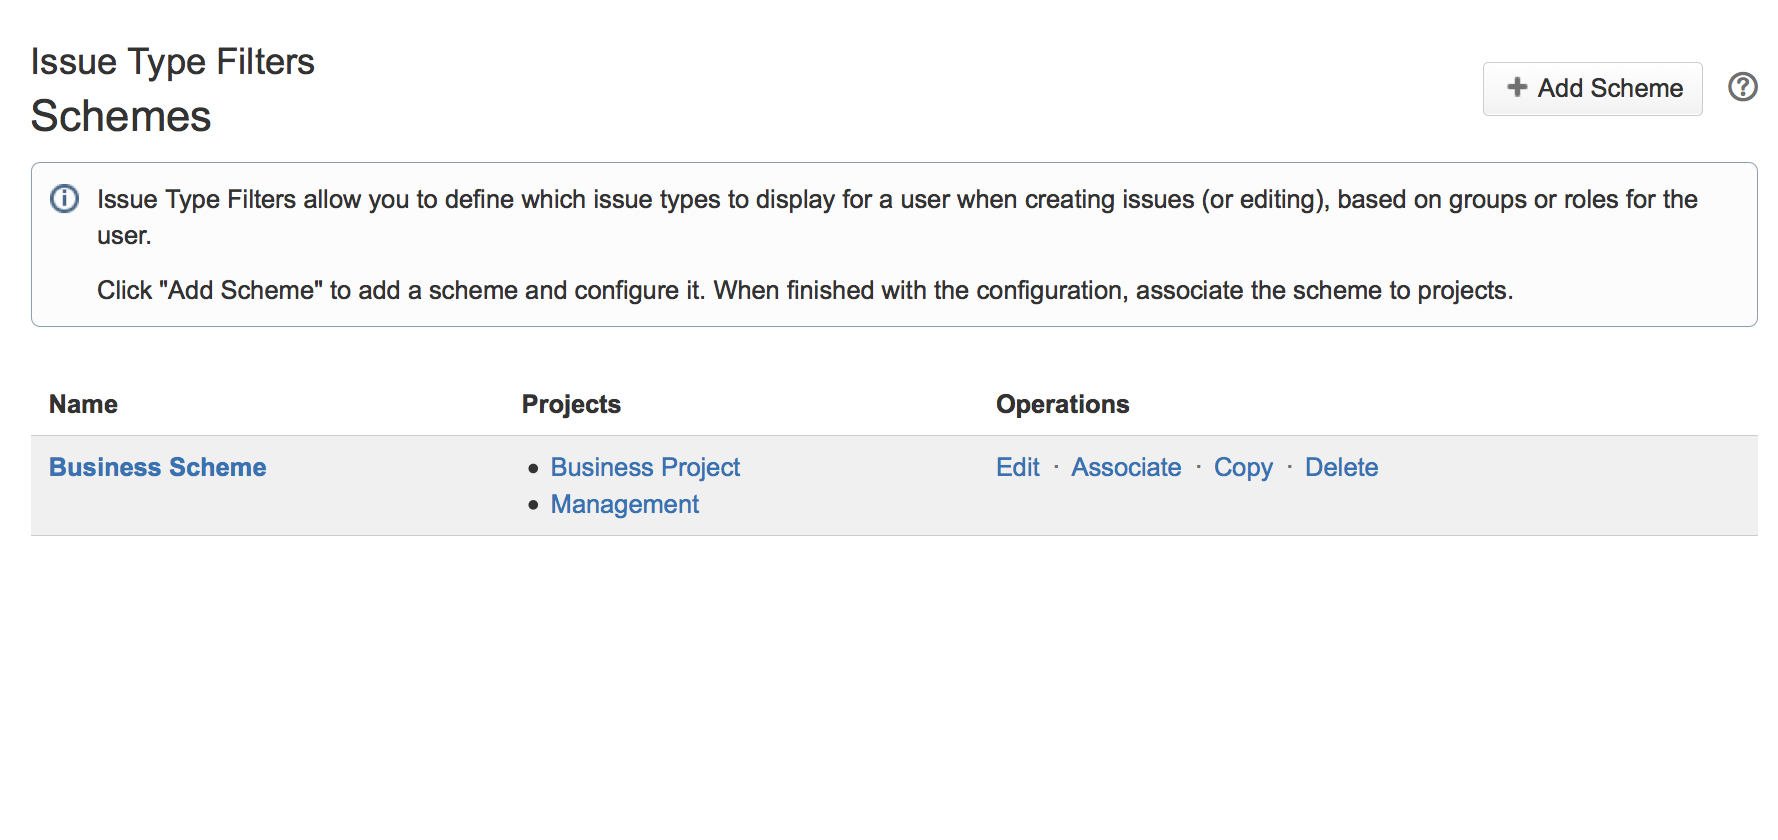
2. Click Issue Type Filters in the Issue Types menu. You will now see an empty list of schemes.
3. Click Add Scheme.
4. Configure the scheme, by selecting which groups and roles (or allow all) for each issue type. You can also leave the fields empty, such that an issue type is not visible for anyone.

5. Click Save
6. Click Back to schemes. Your added scheme should be in the list. Note that the Projects cell is empty. Click "Associate".
7. Choose the projects for which the scheme and its filters should be applied.
8. Click Associate. You are now returned to the Schemes list, and should see the selected projects in the Projects cell.

The effect
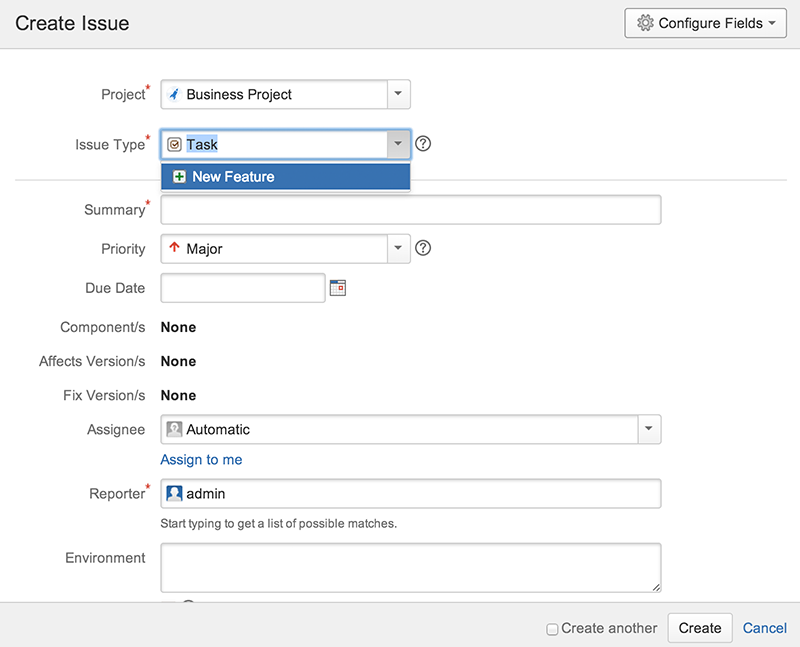
When the filter has been added, observe the effect: Create a JIRA issue. The Issue Type input box would appear like this, if only Task and New Feature was allowed.

Troubleshooting and support
For any problem or question you might have: email us. Have fun.


